Horse & Chariot (2023)
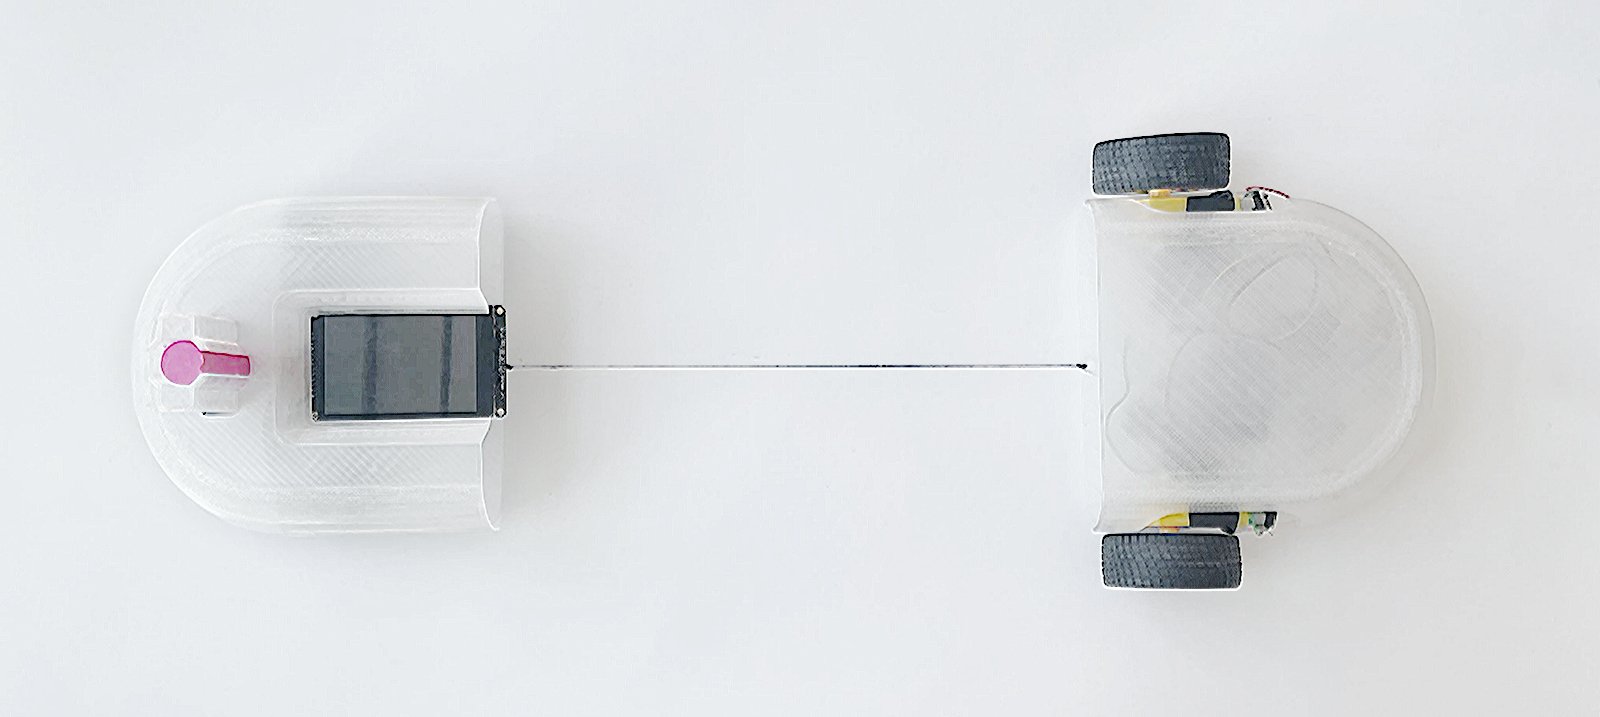
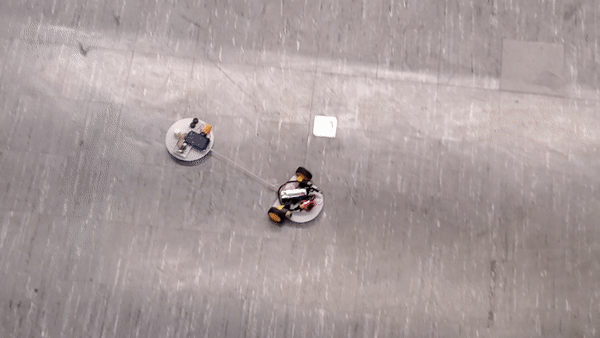
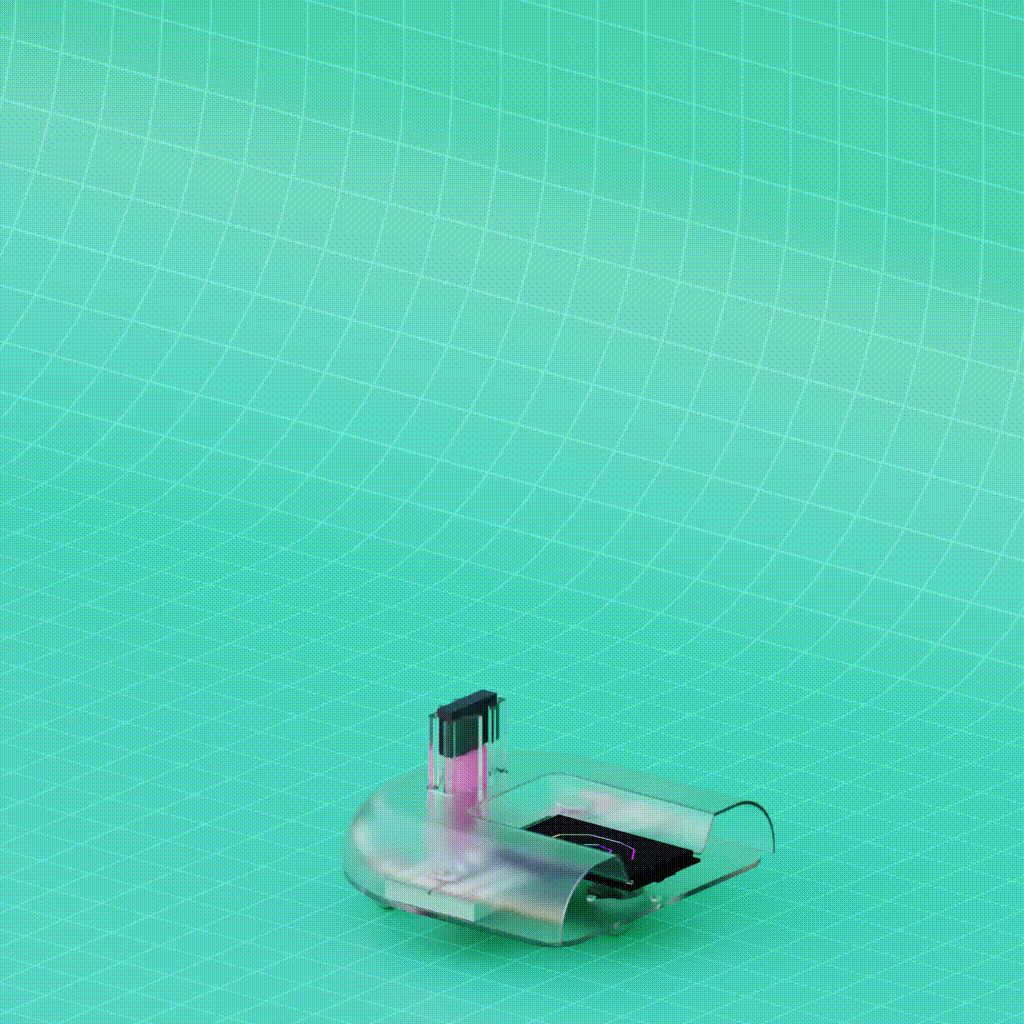
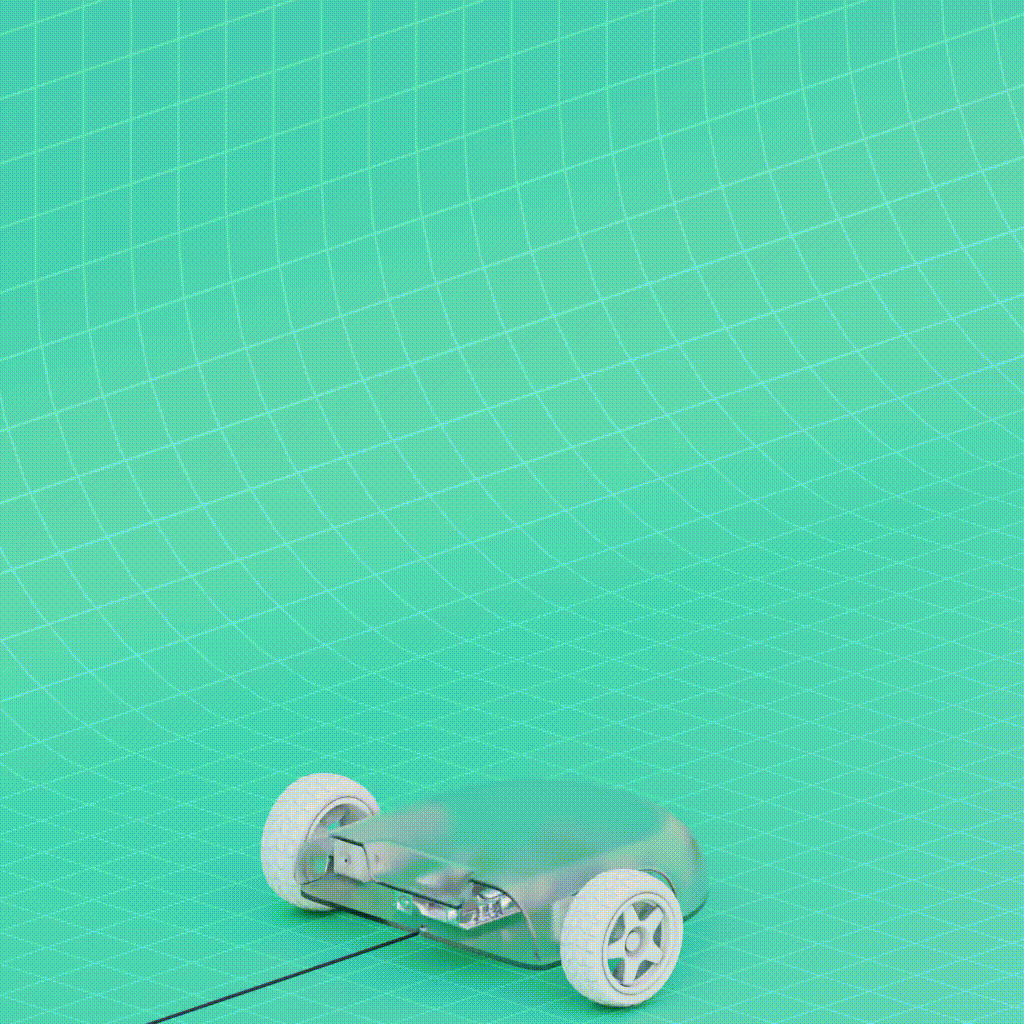
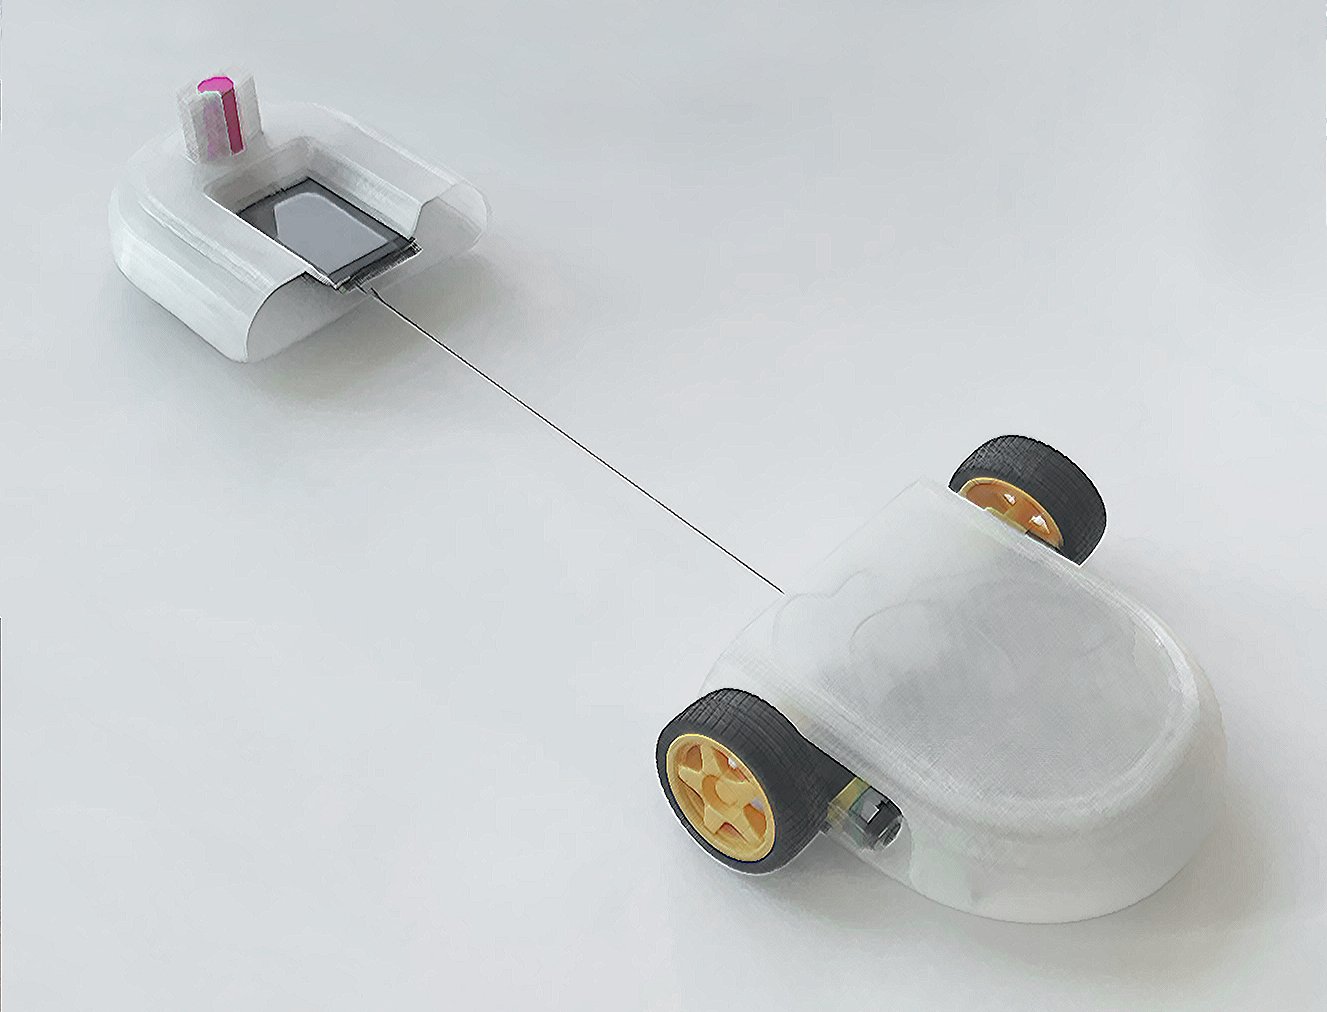
Through audio transmission, touch input, drawing ability, audio reception and motor power, this Arduino project takes a satirical stance on the creation of useful devices in order to explore capabilities of physical computing. It consists of two robots, the Horse and the Chariot, who must work together in order to draw a user-defined path.
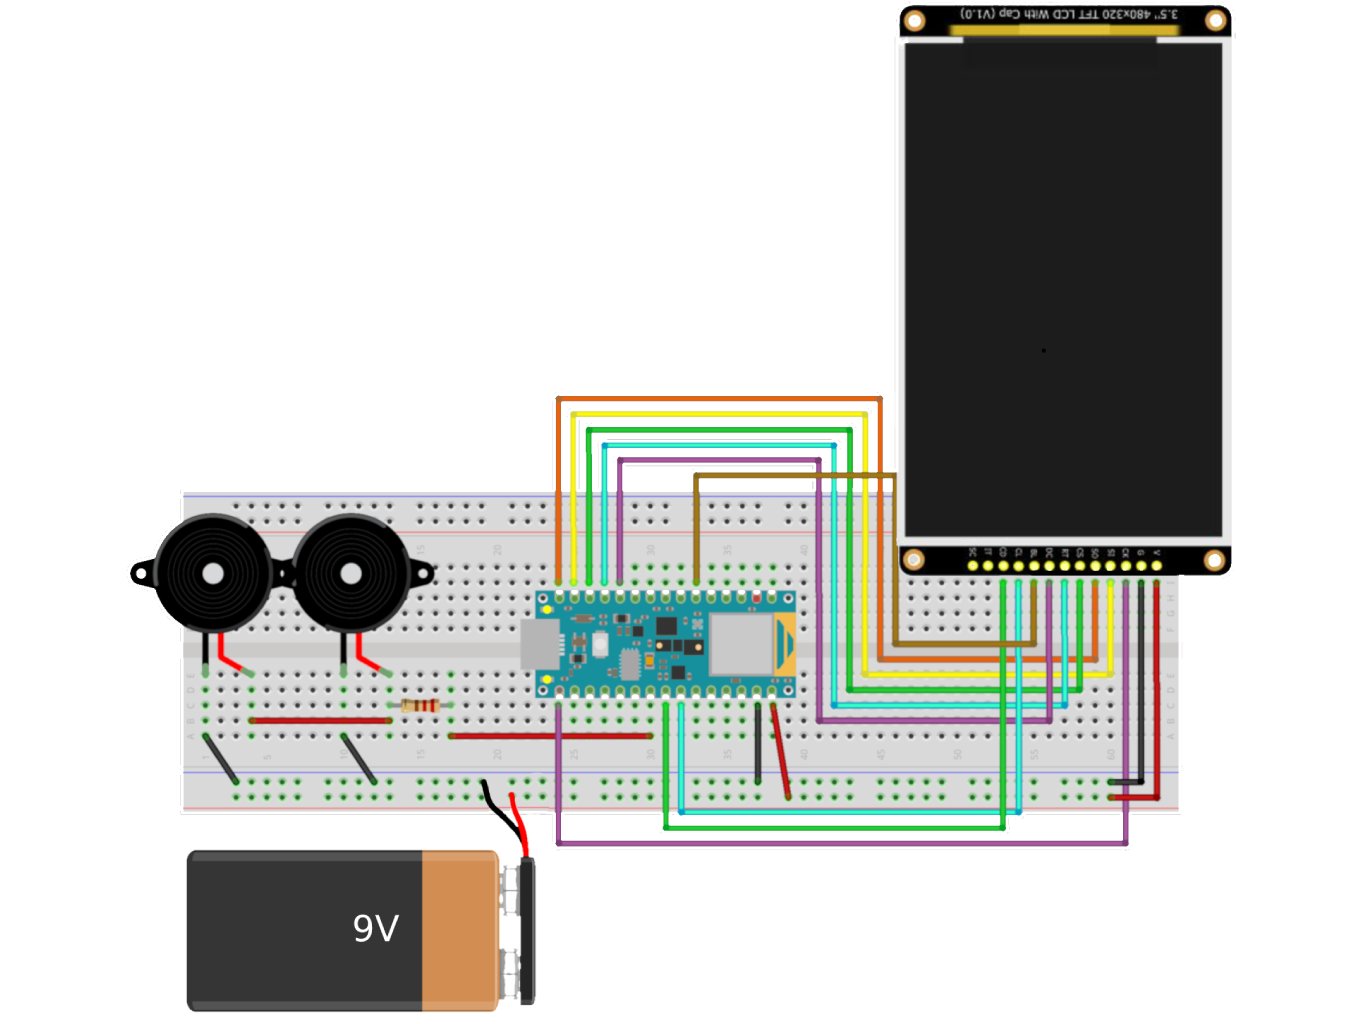
This project was developed as part of the Computational Design and Digital Fabrication seminar at ITECH master´s program in collaboration with Cornelius Carl and Paula Castel. All the code for this project can be found on GitHub.
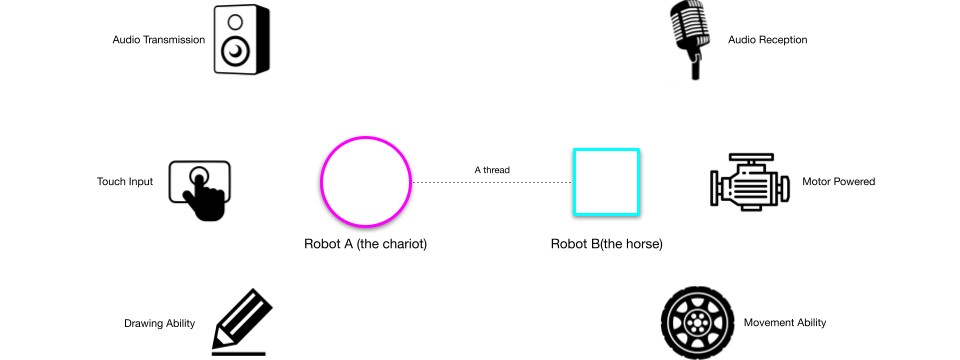
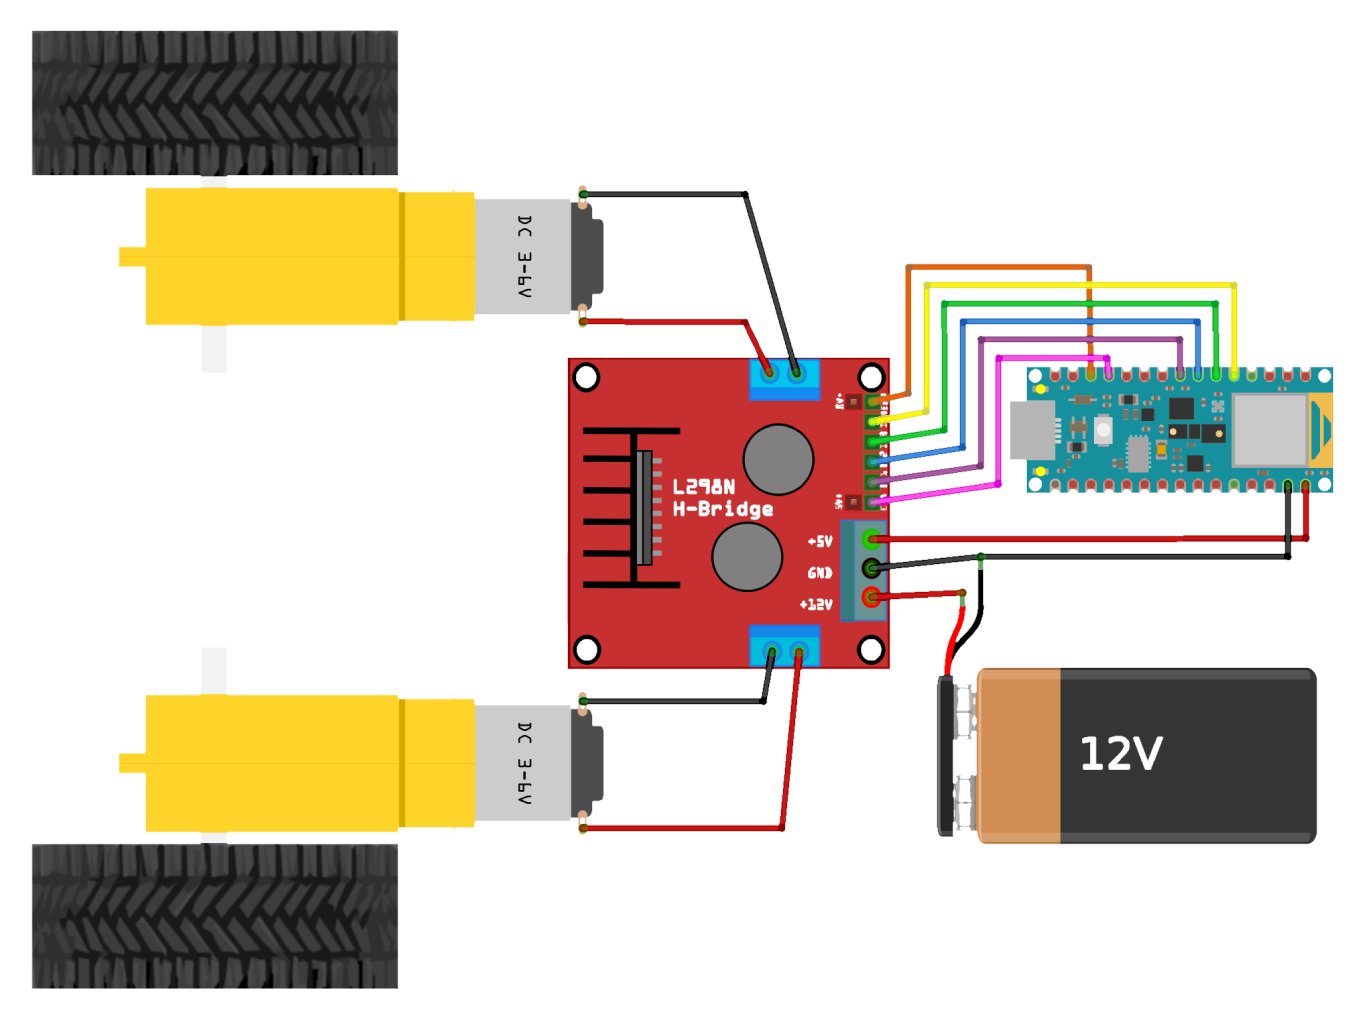
The Chariot is the brains of the operation, rationalizing a path into a set of movement commands then encoding it. The Horse is the wheels of the operation, decoding commands into movements. With the objective of drawing a user input picture, the robots' process is organized into a series of steps that directly relate to hardware organization:
1. User defines path | 2. Path converted to audio movement commands | |
|  | |
3. Transmit (1) audio | 4. Decode audio movement command | |
 |
5. Execute movement & draw
1. User defines path
2. Path converted to audio movement commands
3. Transmit (1) audio
4. Decode audio movement command
5. Execute movement & draw
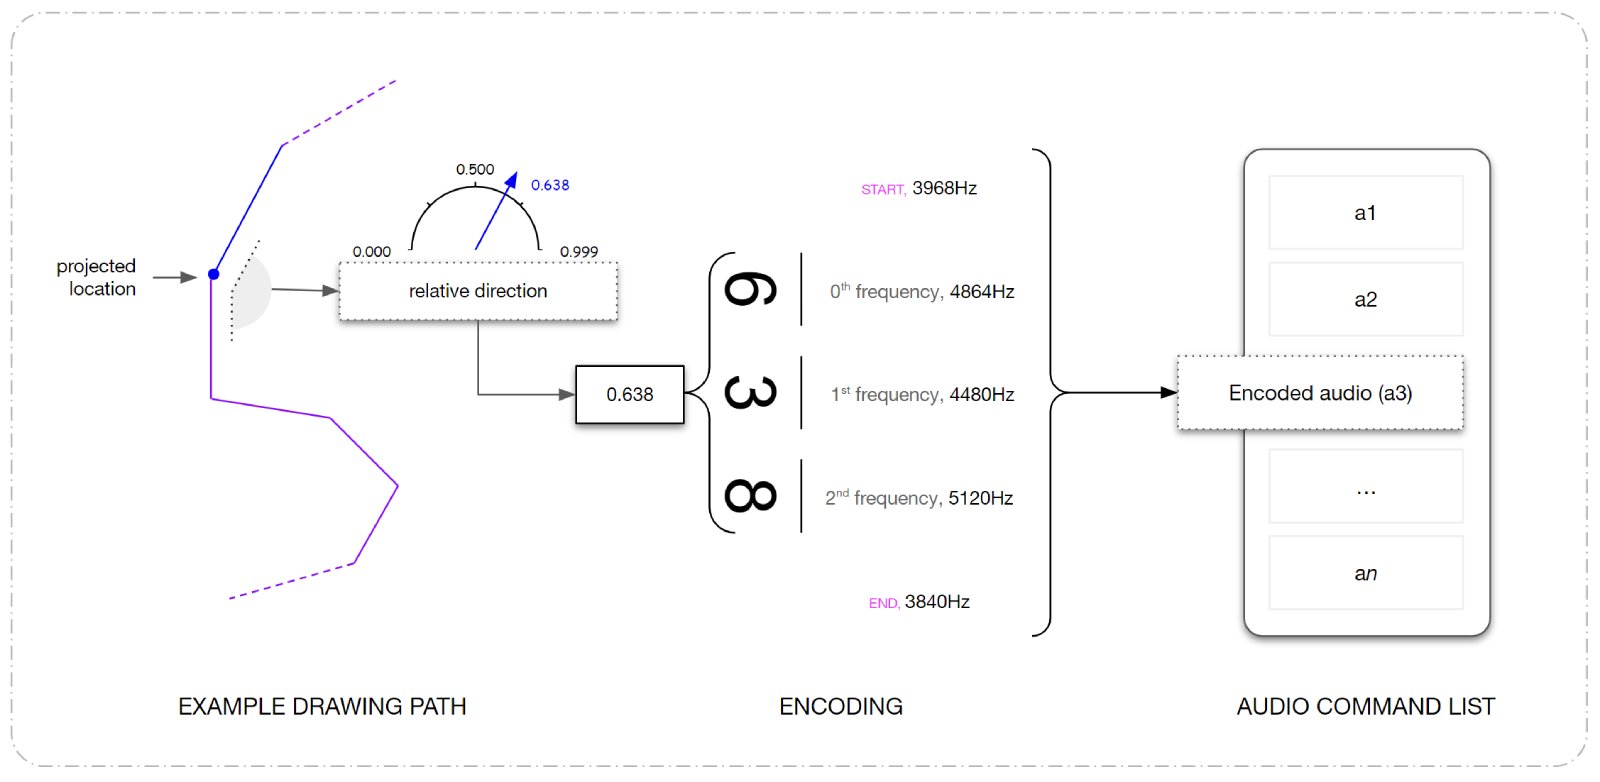
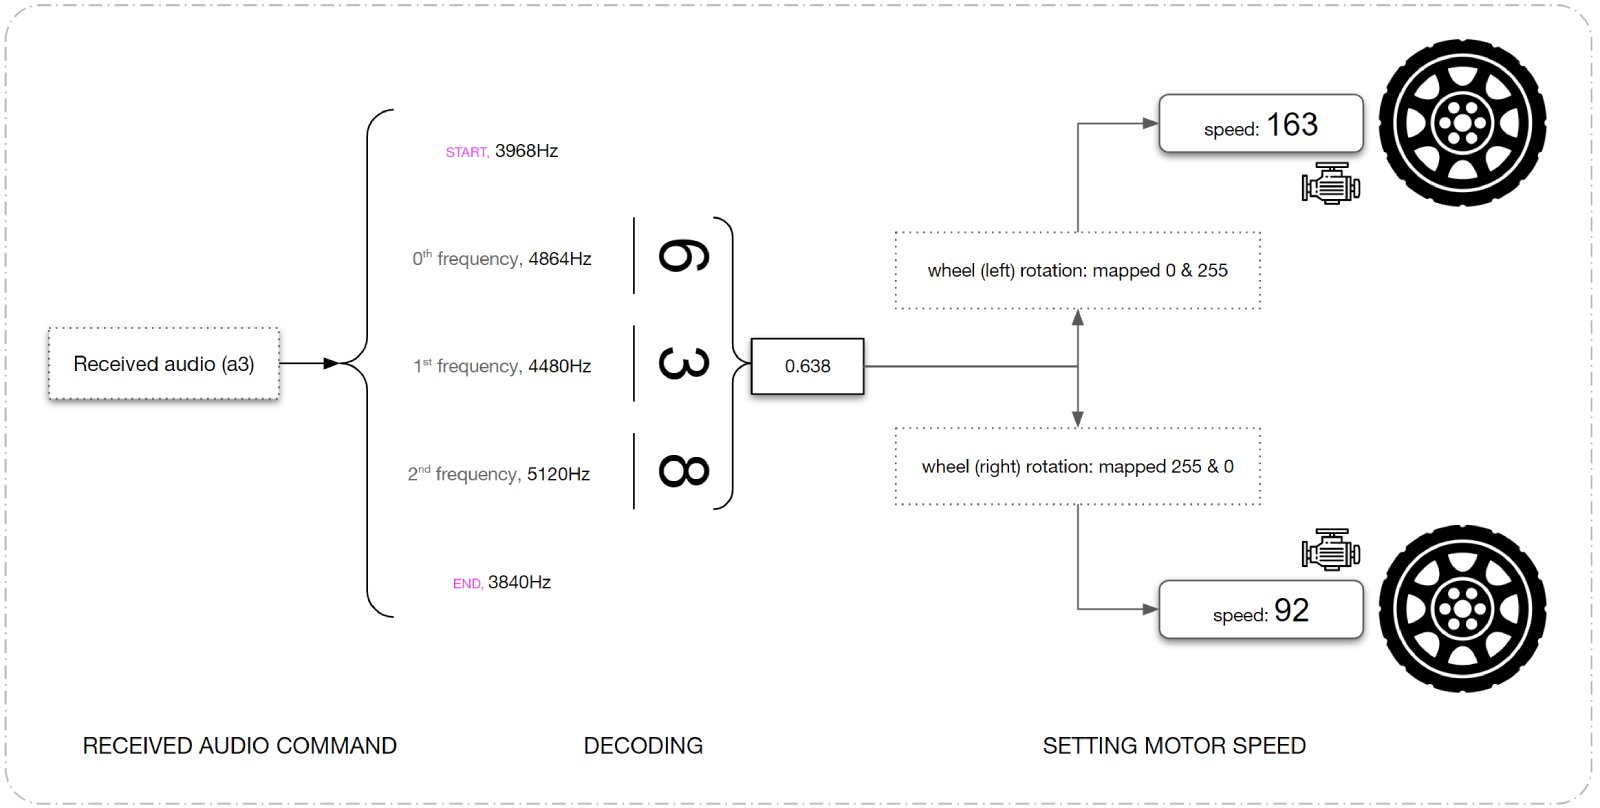
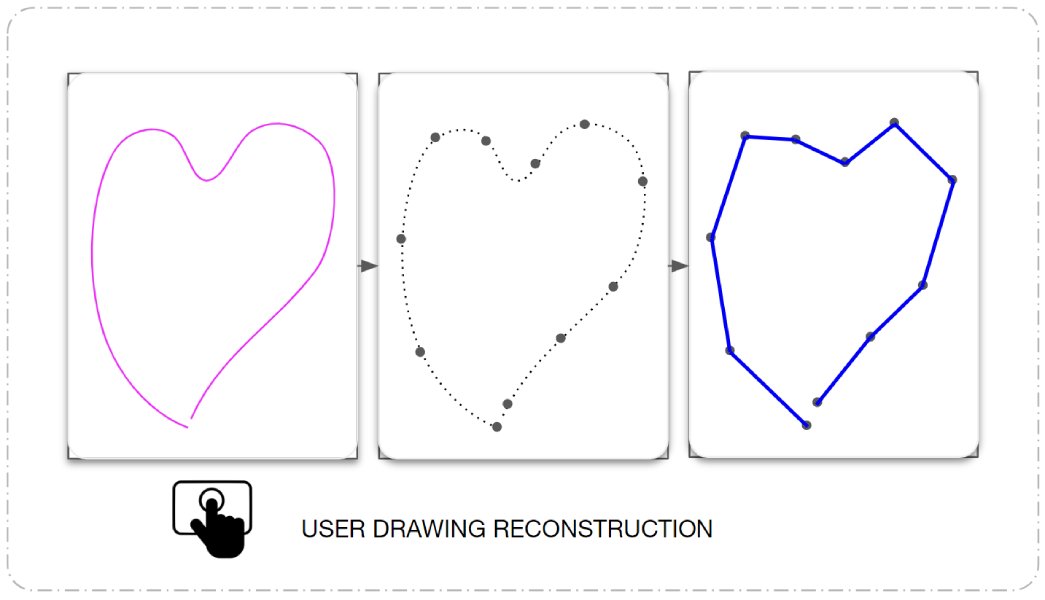
The process of drawing is initiated by drawing a custom path on the Chariot's touchscreen. It records the drawing from the moment of contact until you release your finger. Internally, the path is divided into segments. Next, the path segments are converted into vectors, orient via the previous direction. These values are encoded as numbers between 0.000 and 0.999, where 0.000 is left and 0.999 is right. Each value is converted into a series of five frequencies that are stored in a list. Once every two seconds, the Chariot transmits the series of five frequencies via audio to the Horse. Upon receiving audio, the Horse decodes the direction, virtually reverse engineering the encoding steps to determine the direction vector. The Horse then changes the speed of each wheel in relation to the movement direction.
 |  |  |  |
 |  |
- 2025
- Primitive Slicer
- 2024
- Semantic Floor Plans
- ITECH Research Pavilion
- Wax Flamingos
- Phenomena Modeling
- 2023
- Honeycomb
- Water-QWOP
- Horse & Chariot
- Hyper-hydration
- 2022
- Sprawl & Resilience
- 2021
- Cybernetic Field
- Bubble-GAN
- 2020
- ELC: Carrick
- 15-112: placeHolder
- Collaborative Winding
- 2019
- Flood Museum
- Design Fabrication
- Spring Garden Hostel
- Modular Garden
- Bathhouse
- 2018
- Hoophouse
- Drawings